We put time, money, and energy into our houses to make them feel like home and maintain them. Which is why property borders and boundaries are so important. They ensure our space is secure, private, whilst fitting the style too. We will look at a few different options you can take below, as well as a step-by-step guide to building a panel fence.
Permanent boundary
Making sure that you have a permanent boundary is not just about clearly marking out your property – it can also be about privacy and security.
It’s important to many people to have an outdoor space to yourself that is not on display to the general population.
If you are unfortunate enough to have a thief come looking for an easy take, then making it difficult to get in and out of your property will go a long way towards turning them away. And of course, a well-presented border looks fantastic too.
Property line
Before you start, you need to be certain where your property line is. Boundaries are normally either marked out in planning, or just marked by historic fencing, edging or walls.
If it’s not clear, then you may have to do some research to find the original plans for your home.
Now let’s look at a few options that will set your garden apart.
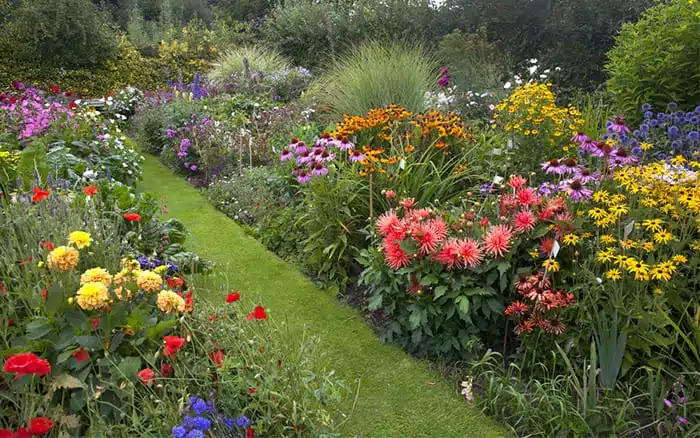
Borders
One of the simplest ways to mark your boundary is by cutting in a border and filling it with plants, shrubs, and trees. I
f you don’t want a fence at all, then be wise and mark out the boundary first with some permanent posts, perhaps with some wire running between.
That way if your trees and shrubs get too big for their boots and you need to cut them back, you can see exactly where the line is.
Your neighbours will know too, which will minimise the dirty looks across the lawn.
Shrubs

If you’re planting a shrub border, it’s always a good idea to have a backbone of evergreens in there.
Things like Choisya ternata, conifers, and rhododendrons are brilliant if your soil allows.
Remember to plant a little way inside the border so your plants have room to grow before they start encroaching on your neighbour’s land.
Hedging
Another option is hedging. As well as creating a strong boundary, hedging makes fantastic nesting for birds and wildlife. It also absorbs sound and pollution, which makes it a great option for facing a road.
Photinia ‘Red Robin’ makes a wonderful evergreen hedge that sprouts gorgeous red leaves every year which then slowly turn green, and it also produces masses of pretty, white flowers.

Leylandii is a very popular coniferous choice, but my favourite is Thuja plicata atrovirens (Western red cedar) – an elegant emerald green and glossy leafed hedge. If you crush the leaves between your fingers, you’ll smell the sweet scent of pineapples.
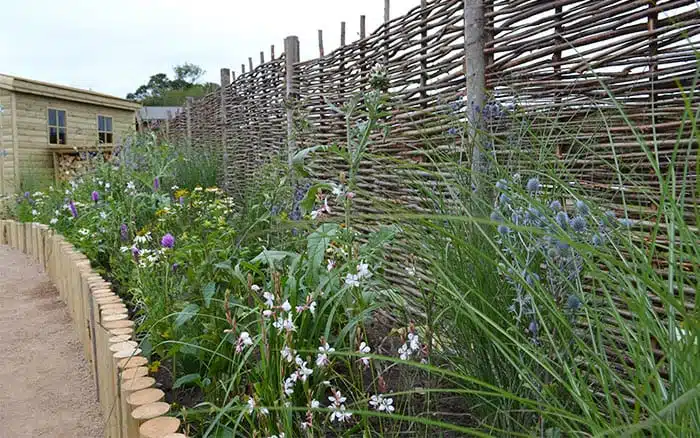
Fencing
Fencing is a great and popular option. There are many different types, from the standard larch lap or woven fencing through to sculptural fencing with dynamic curves and shapes.
Here’s a quick step-by-step guide to fitting a fence:
How to build a wooden panel fence

If you are knocking down an old fence, do make sure it’s yours. Contrary to common belief, it’s not always the one on the left. Also, if you are building a new fence, be absolutely certain of where your property line is.
Once you have chosen what type and what height of panels you want, the first step is to stake the corners, and then tie strings between the stakes and make sure they are squared.
Use bamboo canes to mark out the middle posts. Panels usually come 6ft (1.83m) wide, and don’t forget to add the width of the posts into your measurements.
Now dig your holes for the posts. 450mm is a pretty standard depth for timber posts, and more if you have soft ground. If you’re going for concrete posts then you’ll need at least 600mm, but preferably more like 760mm.
Starting with your corners, add 3 or 4 inches of gravel to the bottom of each hole, place your post in and get it straight, square and at the correct height. A post leveller is really handy at this point.
Concrete
Carefully holding your post in place, pour in instant concrete until the hole is two thirds full. Add water to the top and use a stirring stick to mix the cement. You might need to use some temporary boards to hold it in place until it dries, and then top the hole up with dirt.
When you have your corner posts up, use a builder’s or mason’s line along the top to help you keep all the others at the right height.

Once all posts are in place, fencing clips are the easiest option to attach the panels for timber posts. It also means you can take the panel out easily and replace it if needed. Concrete posts usually have the slots built in.
Rotting

You’ll need to keep the fence panels about 50mm off the ground to prevent them rotting, and the easiest way is to fit a gravel board beneath each panel.
Post caps will also preserve the life of the posts, by preventing water from soaking down into the grain of the wood from the exposed top.
Then you’re done. Now, to finish off, you can embellish and soften the area with plants and paint, to make it fit your garden style.
So, there you have a few simple ways that you can get security, privacy, and style for your garden. I hope it will help you create a peaceful, safe, and secluded spot for you and your family to enjoy.


David Domoney is a Chartered Horticulturalist, Broadcaster, and Author. David has worked with a number of the UK’s leading garden retailers as a plant buyer and strategic consultant. With more than 30 years experience, in horticulture, David is as passionate about plants now as he was when he bought his first plant at a village fete.


Leave A Comment