People may be familiar with taking plant cuttings from stems and leaves but there is another way to make plants for free. And that’s by using the plant’s roots. So, here’s a guide to take root cuttings of perennials.
This is an easy way of making lots of new plants and this month is a great time of the year to do this.
The best times of the year to take root cuttings are when the plants are dormant. So, this would be from late autumn into mid-winter.
Plants to take root cuttings from
The easiest plants to use this method on are plants that naturally produce new plants from their roots (known as ‘suckers’).
Many herbaceous perennials sucker and so these are the obvious choices for using this method. The greatest success seems to come from plants that have thick roots.
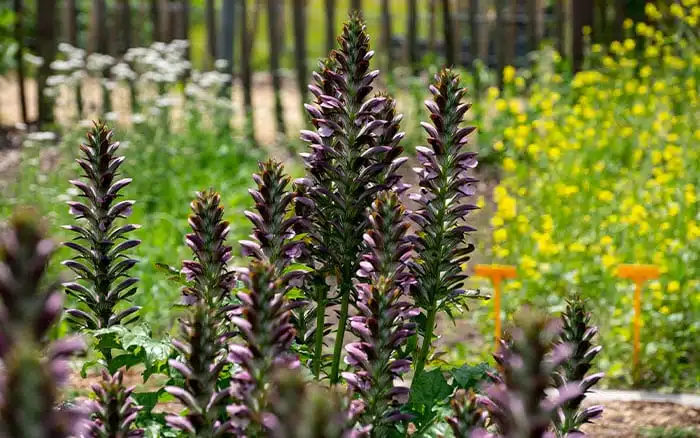
Other herbaceous plants that can be used are Acanthus (bear’s breeches), Anemone x hybrida (Japanese anemones), Primula denticulata (drumstick primrose) and phlox.
How to take root cuttings of perennials
What you’ll need:
- Sharp pair of secateurs
- Cutting board
- Pots filled with either cuttings compost or a 50/50 mix of free-draining compost and grit or perlite
- Grit for top dressing
Step one
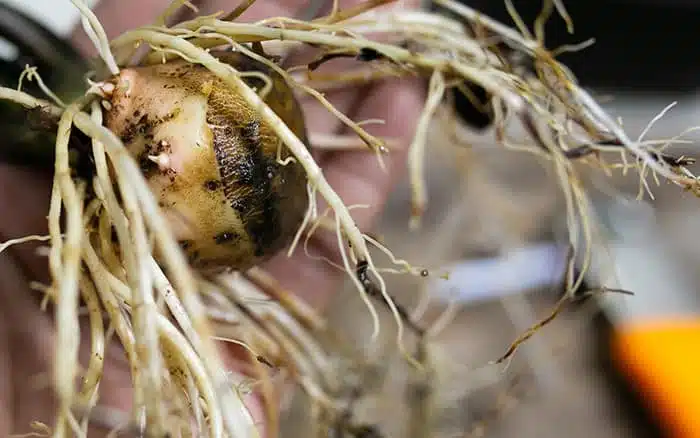
Choose a well-established plant and dig it up during the dormant period and wash soil off the roots.
Step two
Look for long roots that are about a pencil width thick. Trace them back to the crown of the plant and cut the root off using secateurs.
Step three
Cut off the thin end of the root and any thin wispy side roots growing off it.
Step four
You can remove more similar size roots from the mother plant but make sure you take no more than one third of the roots. Otherwise, the plant may become weak.
Step four
Replant the mother plant as soon as possible.
Step five
Next cut each freshly cut root into sections, each between 5-10cm long.
When cutting the root into sections make sure you know which is the top end and which is the bottom end. The easy way to do this is to make a horizontal cut on the top of each section and a sloping cut at the bottom end.
Step six
Place each cutting into the pot, approximately 4cm apart, sloping cut first. Position them deep enough to leave the horizontal cut just below the soil surface.
Step seven
Add a 1cm layer of grit to the top of the pot and then water lightly before placing the pot somewhere sheltered in the garden, ideally in a cold frame.
Be careful not to over-water or place in an area where it may get rained heavily upon, as too much water can rot the cuttings. That’s all you have to do until spring.
At that time check to see if the cuttings have grown their own roots. When that happens, gently separate each cutting, and pot on into individual 9cm pots. Pot them up using a general-purpose compost and let them grow on until ready to plant in the flower border, usually the following year.
With this guide to taking root cuttings of perennials, you can increase stocks of your plants for free.
Find out more about growing veg at home:
Or check out my Pinterest board for more ideas:


David Domoney is a Chartered Horticulturalist, Broadcaster, and Author. David has worked with a number of the UK’s leading garden retailers as a plant buyer and strategic consultant. With more than 30 years experience, in horticulture, David is as passionate about plants now as he was when he bought his first plant at a village fete.


Leave A Comment