Grow potatoes on your plot and this staple crop will bolster any homemade meal. They’re great for beginner gardeners and practised vegetable growers alike so get some in the ground this year to start enjoying your very own homegrown spuds!
Where to grow
Potatoes are grown from special seed tubers instead of seeds. You can buy some from your local garden centre now and I strongly recommend getting those rather than supermarket spuds. Seed potatoes have been cleared of disease and bred to produce other strong, viable new plants.
Rather than just in the ground, small crops of potatoes can be grown in large, deep containers. And this is a clever way of getting an early batch of delicious new potatoes.
But you can grow them almost anywhere, in the ground, in bags, even in a dustbin as a cheap way of getting started.
Potatoes really love a sunny spot as they’re not frost hardy, so find a place that’s aglow in order to grow potatoes like a pro.
What to grow
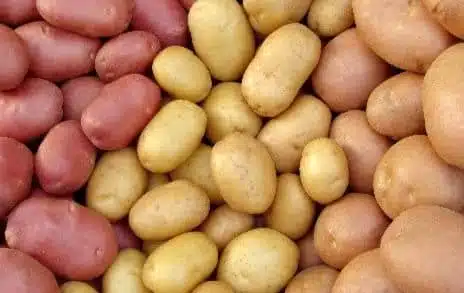
There are three types of potatoes to be aware of: earlies, second earlies and maincrops—these names refer to the time they are harvested. Earlies are the easiest to grow and take up the least space in your garden. But the other two are simple crops and will give you loads of potatoes, which I think is ideal.
Potato crops need different planting times depending on the exact variety.
A rough guide is to plant earlies in late March to harvest in June, pop second earlies in the ground before mid-April. And harvest in July and get maincrop planted in mid-to-late April to harvest by October.
It’s a nice idea to grow your harvest by choosing varieties for your preferred cooking method. As a general rule, early potatoes are the ones to choose for boiled potatoes.
Look to ‘Swift’ for an early that’s quick to mature and has top-class taste. My personal favourites are ‘Kestrel’, which is a second early that makes marvellous mash. Or maincrop ‘King Edward’ if you’re looking to steam.
How to grow
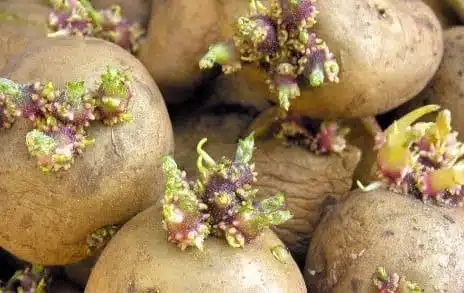
Chitting
Firstly, you’ll need to prepare the tubers by ‘chitting’ them, this means allowing them to start sprouting shoots in a warm environment before planting out—you will have seen the beginning of this process if you’ve ever left potatoes in the cupboard for too long, only to find them with new white and green growth emerging.
Stand them rose end up (this is the one with small dents, or ‘eyes’, in the skin) and place inside an unused egg box. I find they are the perfect size to keep them upright.
You’ll know the potatoes are ready to plant when the shoots are about 3cm long.
Positioning
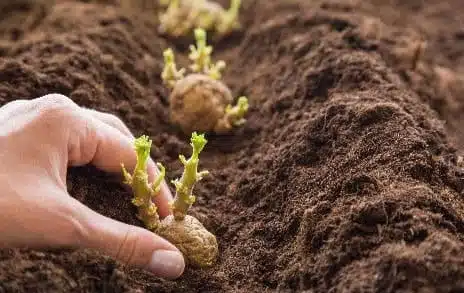
Next, once all risk of frost has passed, compost, position and cover them in the ground. Start by digging a narrow trench and line it with compost. Space the seed tubers, with shoots facing towards the surface, about 30cm apart for earlies. Then allow a bit more space for second earliest and maincrop like ‘Picasso’ AGM or hardy ‘Desiree’ varieties. Handle the delicate tubers carefully and then press over the soil to let nature do her work.

Mounding
The secret is to keep the foliage away from the actual potatoes underground. ‘Mounding’ is a process where you bank up the earth over the emerging shoots, forcing them to grow up and away towards the light.
I suggest repeating this until the shoots and leaves are well removed from tubers. Once the potatoes have begun to grow, they’ll need lots of water. But if the summer is wet, be careful of overwatering which can cause fungal diseases like potato blight—where the leaves and stems go brown. Try blight hardy cultivars like ‘Sarpo Mira’ or stick to earlies—which are usually harvested before blight strikes.
Food to go
Now you know how to grow, it’s time to make the most of your beautiful bounty. With earlies you can simply dig them up and eat. With second earlies and maincrop, they’ll stay in the ground a bit longer and two weeks before you want to lift them, you’ll need to cut off the growth at ground level. This gives the skins time to toughen up.
The trick is to use a garden fork for easy harvesting by just teasing them out or you can use your hands. Once out the ground, my favourite way to use a new harvest of spuds is to take a peeling glove, with its rough surface for grating, and lightly rub of the skin.
Don’t peel them, just rough them up and dislodge the thicker parts of the skin whilst leaving some on for that rustic taste.
Then, boil them up, add a good knob of butter then add rock salt with a pinch of parsley to serve—perfect.
Tip:
Ensure healthy,
strong plants
by dividing perennials regularly.
It also offers the opportunity to multiply
your plants without cost.
Reader questions
How can I get rid of dandelions?
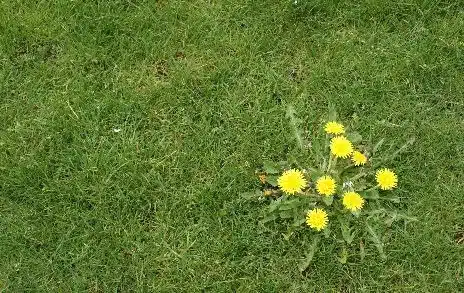
Dandelions have a tap root, so you need to get it all out so that it doesn’t regrow.
How can I save a drowning houseplant?
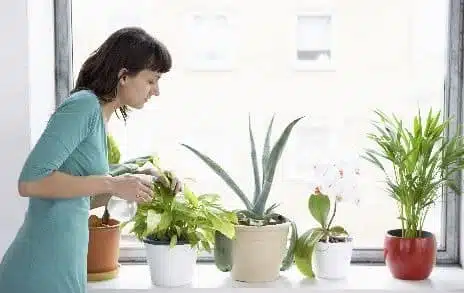
Take it out of the pot and lay it on its side on your sink drainer. Leave it overnight so the excess water can drain out and then pop it on some kitchen roll and prune the rotted leaves away. Position in a brightly lit window sill to recover.


David Domoney is a Chartered Horticulturalist, Broadcaster, and Author. David has worked with a number of the UK’s leading garden retailers as a plant buyer and strategic consultant. With more than 30 years experience, in horticulture, David is as passionate about plants now as he was when he bought his first plant at a village fete.


Leave A Comment