There are few things in the garden that are as exciting as sowing seeds. From placing the seed in the soil to waiting for it to grow into a seedling. There is a wonderful sense of joy when the green shoots pop through. I still enjoy that same excitement as I did when I sowed my first seeds when I was small.
I’m going to show you the best methods to sow seeds. And illustrate how to treat different types of seeds to get the best results.
What do the labels on seed packets mean?
Gardening has many terms that on the surface can seem a little confusing. Yet, once you know what they mean, they make a lot of sense. I have a detailed and user-friendly glossary that may find useful too.
Hardy annuals
These are plants that can cope with cooler conditions. But as an annual, they only live for one year. You can sow these seeds directly outdoors. Just check the packet to make sure you plant them out at the right time of year.
Half-hardy annuals
These are plants that need protection from colder weather and will only live for a year. You’ll need to sow the seeds indoors first and then plan outdoors when the weather is warmer.
Biennials
These are plants that have a two-year life. In the first they will establish themselves through the growth of foliage. And in the second they will flower and produce seed.
Hardy perennials
Perennials are plants that live for more than two years and can cope in colder weather.
Half-hardy perennials
As with their hardy counterparts, they live for more than two years, but welcome protection during colder weather conditions.
Sowing seeds outdoors
You can sow seeds in pots or the ground, the amount of space that you may have will determine this for you. If you are sowing directly into the earth the packets will tell you at what time of year this needs to be.
Now if you are planning to grow a flower bed packed with blooms, then there is a technique that you can use that will produce an attractive display. This method will work for hardy or half-hardy varieties, you just need to ensure that sow the seeds at the right time of year.
Let’s work through this step by step:
Soil preparation
Your first step is to prepare the soil to ensure that seeds will get enough water and air, and the new roots can reach down to grow. You want to be working the soil when the surface is dry but below is moist. You will want to rake soil so that it is level and be crumbly to touch on the surface. You’ll need a soil or bow tine rake to do this work.
Designing the bed
Referred to as ‘Marking out’ this task isn’t essential. After all its great fun to cast seed. But, by marking out the bed, it will help you achieve a more attractive and even looking flower bed. Plus, it will make thinning out and weeding much easier to do.
You mark out the bed by creating seed drills. Drills are straight grooves or furrows made in the soil. And despite what you may think you can get creative with the drills too.
Here are a couple of examples:

Completing your drills
The drill itself is determined by the size of the seed. A good method to follow is double the amount of soil to the size of the seed. So, if a seed is 2cm tall, then your drill depth should be 4cm.
Top Tip
You want the soil to be dry when sowing seeds, so avoid watering until after.
There are various gadgets on the market to help you can you with the drilling. But I find a broom handle is easy to use.
If you are planting different varieties of seeds in the same bed, then mark those areas with bamboo cane and pop on a plant label.
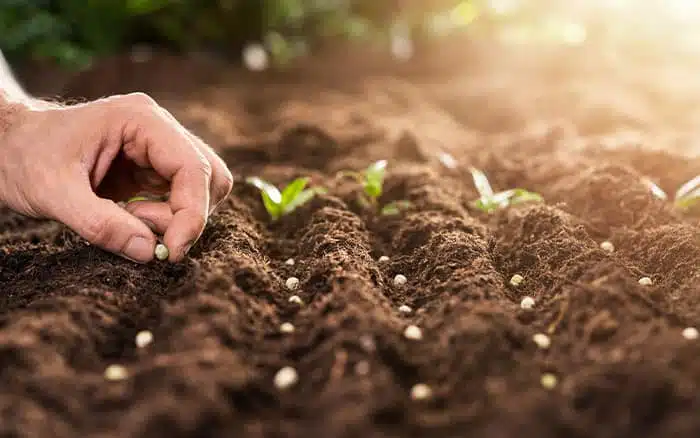
Sowing
Your aim is sow thinly. Carefully place the soil into the drill and space out as the seed packet advises. This takes time but you will have an even spread of your seeds. Once your seeds have been placed in the drill, you can then rake over the soil to fill in the grooves.
Gently water the area, use the shower setting from your hose gun, or make sure the rose of your watering can is attached. Now you just wait for germination to take place. This will vary by plant but will normally occur within 10-14 days.
I’d also make sure that there is another easy to access food supply in the garden for birds. This in my experience works much better than any deterrents.
Top Tip
Use some horticultural/dry or silver sand with very small seeds. This helps you achieve an even spread.
Thinning out
After your seeds have germinated, you’ll start to see lots of tiny green shoots and leaves in your new bed. This is point at which you need to remove the poorer performing seedlings. Work on a principle of 1 inch or 2.5cm per seedling. It is important to be gentle when lifting the seedling, you want to avoid disturbing the plants you want to retain.
Check the seedlings again in 10 days’ time to see if you need to remove any more struggling seedlings. Work on the same spacing principle – but you seed packet should help this with this.
Sowing seeds indoors
So, for your half-hardy seeds you need to start these indoors. This is because the weather is too cold for the seeds. You can also start of some of your hardy seeds this way too, particularly if you are looking for several of them to start in flowering early.
Again, before you start, read the seed packet, it will advise you the months in which you can start this process.
What do I need to get started?
A suitable container – make sure the container is clean and dry before you start. You can pick up seed trays with drainage holes in them, or make your own, but if you are using unglazed clay pots, they need to be soaked overnight first.
Why soak the clay pot you ask? Well soaking the pot enables the pot to absorb moisture which in turn prevents the compost from drying out. This approach may not be work as well in warmer climates, where the pot can dry out quicker. In which case a good watering regime is critical to success.
Some Peat-Free Seed and Cutting Compost – you can use standard Peat-Free compost, but the seed and cutting varieties have been especially mixed to improve performance.
Ready to sow? Not quite.
Next up you need to add a layer of compost into the container. A seed tray tends to be easier for this bit. Firm the compost in the container, and sprinkle with water. You want your compost to be moist, so waiting a day before you plant your seeds will help.
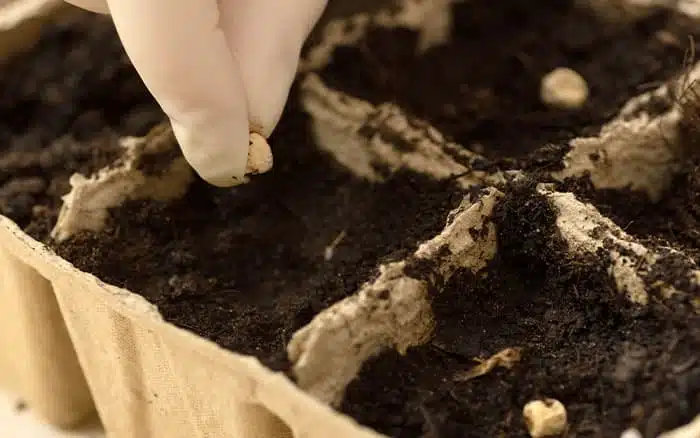
Now everything is ready, sow your seeds thinly and then cover with another layer of compost. Try not to use too much as thin layer is all you need. And if your seeds are very small then you don’t need to apply the extra layer.
Which Method Man?
You now have two choices. You can:
- Use the under-glass method or.
- Windowsill method
The under-glass method will require you to have a sheet of glass available. Which you may or may not have, if you do, then layer the pane over the top of your container and then place a dark sheet of paper over the top. Your aim to create a temperature that is between 15.5 to 21.1 degrees Celsius (60-70 Fahrenheit) for the seeds. Each day, you’ll need to turn the glass over and wipe off the condensation before you put the paper on top.
Once the seeds have germinated and seedlings are appearing, then you want to increase the amount of light the plants get. So firstly, remove the paper, and prop the glass up, don’t remove it completely yet though. Give a couple days and then you can remove the glass and move your container into a position where the seedlings can get more light. Use a spray bottle to keep the soil moist.
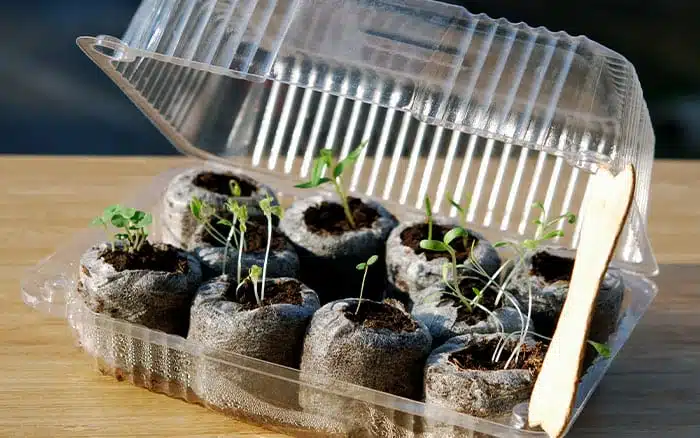
The windowsill method is easily, particularly if you are using a pot. Place a clear plastic bag or half of a plastic bottle over the container and secure with an elastic band. Pop the container in a place that is in shade but is still warm. You want to match the temperatures in the under-glass method.
As the seedlings start to appear, you can remove the bag and place the container on windowsill that doesn’t get too much direct sunlight. To ensure that you have balanced growth, turn the pot every day and keep the compost inside moist.
Potting on
Once you can start to see leaves appearing you can prick out the weaker seedlings. Then fill a container or tray with potting compost. Gently lift your seedlings by the leaves, and plant them at 3cm intervals.
After you have done this, then keep the seedlings in a shady spot for a few days, to help them adjust to their new home.
Harden off
After a couple of days, the seedlings should have adjusted nicely to their new home. Now is the time in which they need to harden off. This process allows the seedlings to adjust themselves to cooler temperatures whilst still in an environment you can control easily.
If you have a cold frame, then place the seedlings in this. During the day lift the seedlings outside and then in the evening bring them indoors or back into the cold frame. After a week or so your seedlings will be ready to be planted out.
Now you too can take joy in the thrilling activity of sowing seeds yourself. Whether you do it indoors or outdoors, sowing your seeds is easy and fun, and by following these steps you can do it expertly.


David Domoney is a Chartered Horticulturalist, Broadcaster, and Author. David has worked with a number of the UK’s leading garden retailers as a plant buyer and strategic consultant. With more than 30 years experience, in horticulture, David is as passionate about plants now as he was when he bought his first plant at a village fete.


Leave A Comment